Introduction
While testing some functionality in my HP T530 Thin Client's Linux based ThinPro 8 operating system, I found myself with a corrupted partition. I was testing the BIOS password removal process using the inbuilt hptc-bios-cfg tool. After running the tool and initiating a reboot, the ThinPro operating system refused to load, leaving me in an initramfs shell. Now I am not a Linux expert but I did try a few things, even finding myself in a grub shell where I could list and search each partition for the expected operating system files. I couldn't find the expected partition with the expected files. How was I to recover this thin client's ThinPro operating system with my limited Linux know how? I did find a way out of this mess, which I will write about in this blog. It might work for you as well.
How I recovered my T530 Thin Client
In summary I was able to restore my TC by:
1) Booting the TC device into the Windows PE environment from a bootable USB key
2) Deleting all partitions on the TC's drive, and creating a new partition.
3) Booting the device into the HP ThinPro PC Converter Tool's environment from a bootable USB key created using the HP ThinPro PC Converter Deployment Tool application.
4) Applying the ThinPro 8 operating system to the TC's drive.
To fix your failing ThinPro operating system you will need to install the following applications on a Windows 10 or Windows 11 device:
- HP ThinPro PC Converter Deployment Tool (HP_ThinPro_PC_Converter_Deployment_Tool_N44254-002.msi) - get an evaluation license and the installer here: h30670.www3.hp.com/portal/swdepot/displayProductInfo.do?productNumber=HPTPPCCT
- Windows Assessment and Deployment Toolkit (adksetup.exe) -available here: https://learn.microsoft.com/en-us/windows-hardware/get-started/adk-install#download-the-adk-101253981-september-2023
- Windows PE add on for Windows Assessment and Deployment Toolkit (adkwinpesetup.exe) - available here: https://go.microsoft.com/fwlink/?linkid=2243391
- Connect a USB key to your Windows device, after installing the above applications - make a note of the drive assigned to the key; this is usually d:
- Right click on the Deployment and Imaging Tools Environment from the Start menu and select More and then Run as Administrator.
- Extract the WinPE files by running this command: copype amd64 C:\WinPE_amd64
- Create the USB WinPE bootable device with the following command MakeWinPEMedia /UFD C:\WinPE_amd64 <drive of USB Key>. For instance: MakeWinPEMedia /UFD c:\WinPE_amd64 d:
- Press Y to agree to losing any data on the USB key.
- From the Start menu run the HP ThinPro PC Converter Deployment Tool. Browse to your license file or click to Get a Trial License. Click on Next.
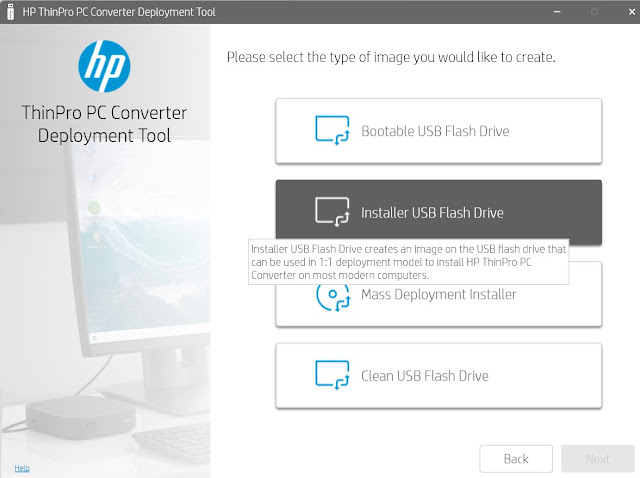
- Click the second option - Installer USB Flash Drive
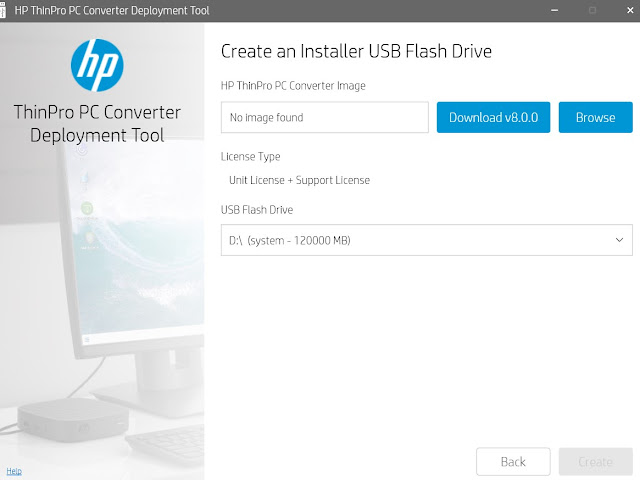
- If this is the first time you have run the tool you can click to Download v8.0.0, otherwise browse to select the desired image if the image box is not already populated.
- Click on Create and then Exit when the converter key has been created.
- Type diskpart and Enter and then list disk. This will display the Thin Client's disks as well as the USB key. Make a note of the TC's main disk - usually disk 0
- Type select disk <TC's main disk - usually disk 0). In this case I type select disk 0 and press enter,
- Warning this command will wipe your main disk. Type clean and enter.
- type create partition primary and press enter.
- Type Active and press enter
- Type Exit and then press enter
- In the WinPE cmd.exe shell type exit. The TC will reboot. Pressing ESC or F9 boot into the ThinPro converter USB key
- The ThinPro converter tool will carry out a compatibility Check
- Click on Install ThinPro to internal Storage.
- Click on OK to accept the disk wipe out warning.
- Click No if prompted to Preserve current ThinPro settings.
- The ThinPro OS installation commences.
- The Running custom ThinState operation completes.
- Click on OK and click on Details to view the completed events.


