
Introduction
MECM is a very powerful management system and does collect a lot of data about devices, and this means I often get asked for information about devices. One manager might want to know which devices have Firefox installed and another may need to know which devices are low on disk space. There is so much information in the database and, in most cases, I'm able to whip up a query and deliver on the data request within the hour, workload permitting.
A few weeks ago I got asked about warranty information for laptops. Which laptops are out of warranty and which laptops will soon be out of warranty. I was able to produce some reports based on the date the devices were registered in MECM, but this was only an estimation.
1) A machine may have been provisioned months after purchased - and the warranty period starts from the date of purchase or delivery, not the provisioning date.
2) A machine may have been returned for a rebuild - and in this situation the estimation could be hugely inaccurate.
3) A machine entry in the MECM database may have been deleted, for whatever reason, and the client reinstalled and re-registered.
And then I discovered the UK Lenovo Warranty Lookup page at:
https://pcsupport.lenovo.com/uk/en/warrantylookup#/
And then I discovered the Run batch query page at:
https://pcsupport.lenovo.com/uk/en/warrantylookup/batchquery
I knew then I had the means to supply this manager with exactly the information he required for all the Lenovo devices.
In this article I will describe how I completed this request. I will cover the following steps:
1) Download the Lenovo Template.
2) Populate the Lenovo Template.
3) Submit the data and retrieve the warranty information.
4) Retrieve additional data from a MECM query.
5) Create a database and import the required information - this is to add machine name and other information to the warranty data returned from Lenovo.
6) Create a SQL query to connect the Lenovo data with the MECM data.
Download the Lenovo Template
If you are in the UK navigate to:
https://pcsupport.lenovo.com/uk/en/warrantylookup/batchquery and click on Download the Latest Template


Save this file to a convenient location and provide it with a relevant name such as LenovoUpload.xlsx.
Populate the Lenovo Template
Next, we need to create a query in the MECM console. This will allow us to populate the Excel template file downloaded in the previous step. Thus we need to create a query to retrieve the model number and the serial number. Open the MECM console and navigate to Monitoring\Queries. Right click and select Create Query. Enter in a name such as Lenovo Batch Info.

Click on Edit Query Statement.

Click on Show Query Language and copy the following query statement into Query Statement area.
select SMS_G_System_COMPUTER_SYSTEM.Model, SMS_G_System_PC_BIOS.SerialNumber from SMS_R_System inner join SMS_G_System_PC_BIOS on SMS_G_System_PC_BIOS.ResourceID = SMS_R_System.ResourceId inner join SMS_G_System_COMPUTER_SYSTEM on SMS_G_System_COMPUTER_SYSTEM.ResourceID = SMS_R_System.ResourceId inner join SMS_G_System_OPERATING_SYSTEM on SMS_G_System_OPERATING_SYSTEM.ResourceId = SMS_R_System.ResourceId where SMS_G_System_PC_BIOS.Manufacturer = "LENOVO" and SMS_G_System_OPERATING_SYSTEM.Caption like "Microsoft Windows 10%"

Click on OK and Next to create the query.

After creating this query, run it to retrieve the results. Press CTRL A and then CTRL C to select the results and copy the results.
Open the previously created template spreadsheet and paste (CTRL V) the results into the spreadsheet. Save the spreadsheet.

Submit the data and retrieve the warranty information.
Having retrieved the serial and model numbers from MECM and copied them into the template spreadsheet, we can now upload them to the Lenovo portal and retrieve the desired warranty information.
Navigate to the following URL:
https://pcsupport.lenovo.com/gb/en/warrantylookup/batchquery
Click on Browse and select the previously populated and saved spreadsheet.

Click on Submit to download the required warranty information


After running this query, press CTRL A and then CTRL C and paste the data into an Excel file. The column headings I added to my spreadsheet were name and serial.

Create a database and import the information
And now we have all the data required for our warranty and in two files. You could hand them over to your database administrator and ask kindly for him or her to do their magic and combine the netbios names in the mecm.csv file with all the warranty data in the lenovo.csv file - but where is the fun in that?
We can do it ourselves. You might prefer to use an Access database, but here I use the SQL database on my test server.
I open up the Microsoft SQL Server Management Studio and right click on Databases and select New Database. In the Database name field I enter in WarrantyLookup and click on OK.

The database is created and that is how simple such a thing is. Now we need to import the lenovo.csv and the mecm.csv files into the database - each file will be imported into its own table.
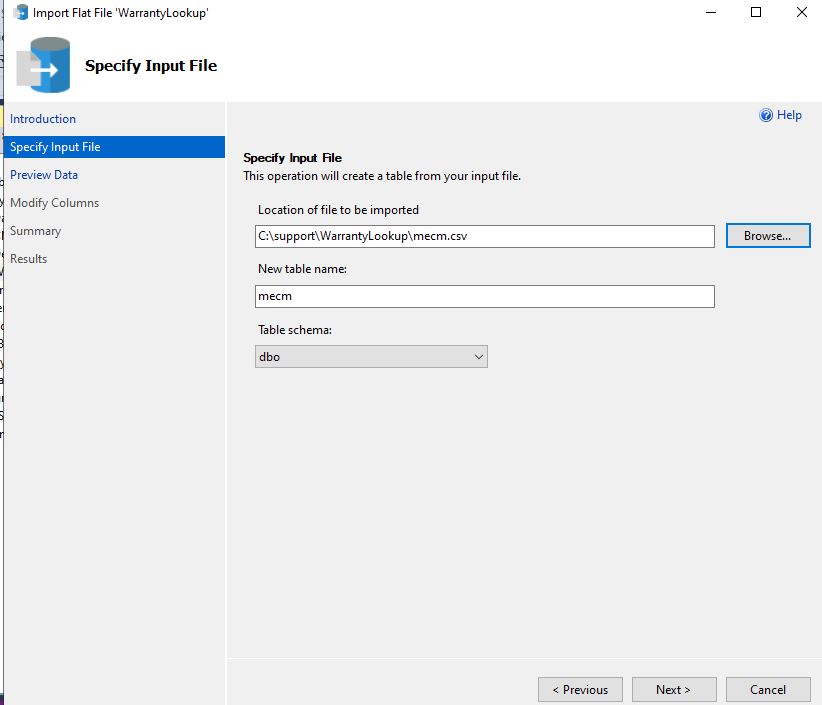
Navigate to the WarrantyLookup database in the SQL Server Management Studio and right click and select Tasks and then Import Flat File.

Click Next at the Introduction window of the wizard. On the Specify Input File windows browse to the the mecm.csv file. You can leave the default table name or change it to mecm to match our example.
Click Next on the Preview Data page. On the Modify Columns page confirm you are happy with the column names.


select * from
mecm me
inner join lenovo le
on le.serial = me.serial
After pressing Execute our required data will be returned.

This data can be copied and pasted into an Excel spreadsheet (CTRL A and CTRL C and CTRL V) and filtered according to your requirements.
I hope you enjoyed reading this article and I hope your manager appreciates your hard work when you present to him or her, the warranty data relevant to your environment.
Colin
No comments:
Post a Comment